title

Motorcycles, tools, and garages! A little bit of everything mechanical and technical.

Showing posts with label Sheet Metal. Show all posts

Wednesday, July 08, 2015

Metal Earth laser-cut model review- Avro Lancaster.

Stumbled across this laser cut miniature model a few weeks ago while on the Cali trip with my eighth graders.  These are made by Metal Earth, and are VERY detailed and fun to put together, although they are NOT what I would call easy to assemble.

I paid quite a bit more than amazon is asking for the same kit here ($6.64):  http://www.amazon.com/Fascinations-Metal-Earth-Laser-Model/dp/B00FFCI2XU/ref=sr_1_sc_1?ie=UTF8&qid=1436406536&sr=8-1-spell&keywords=metalearth+lancaster

Very small package.  They claim to have 360 degree views to help assemble the models here: http://www.fascinations.com/metalearth/gallery360 but I was unable to find the Lancaster there.


Laser cut, very detailed, and dang challenging to put together. Fairly simple when you look at the directions and parts...


But looks can be deceiving.


These little engine pods were a pain to build. If you can find a rod about the diameter of what you need its pretty easy to curl the metal around it.


Starting to come together!


Done.


Part of what makes it so hard to do is the size- pretty dad gum small.


So overall this was a WAY fun project.  Took me maybe an hour and a half start to finish.  It was challenging enough to make it exciting but not so hard I got frustrated with it.  Definitely NOT for begginers or very easy.  I do think they have a few simpler models that might be great to try and see if you like it. 

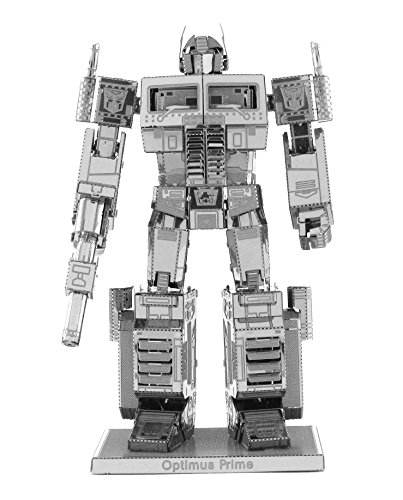
I *definitely* recommend this to any model builders or people who like to work with their hands.  I think they are a bargain at the prices you see them on amazon, and there is a HUGE variety- planes, tanks BUILDINGS, Transformers, and even STAR WARS ships!!!

Here are a few of the others:


http://www.amazon.com/MetalEarth-3D-Metal-Model-Pirate/dp/B005Y22FY8/ref=sr_1_4?ie=UTF8&qid=1436407434&sr=8-4&keywords=metal+earth

http://www.amazon.com/Halo-Metal-Earth-Warthog-Model/dp/B00QE4RVEO/ref=sr_1_47?ie=UTF8&qid=1436407553&sr=8-47&keywords=metal+earth
http://www.amazon.com/Fascinations-Metal-Earth-Laser-Model/dp/B00TMTSZKC/ref=sr_1_9?ie=UTF8&qid=1436407805&sr=8-9&keywords=metal+earth+prime
And my PERSONAL favourite- The John Deere model B!

http://www.amazon.com/Metal-Earth-3D-Model-Tractor/dp/B00BELHSZO/ref=sr_1_1?ie=UTF8&qid=1436407889&sr=8-1&keywords=metal+earth+tractor

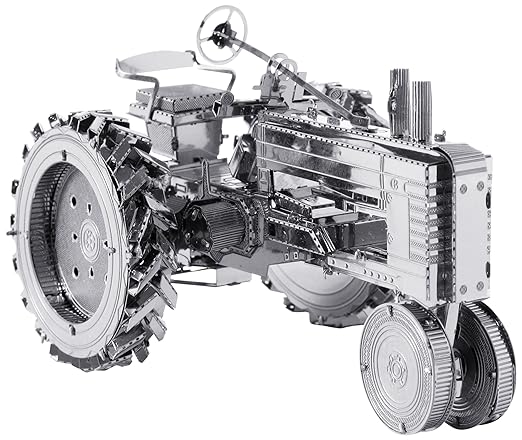
There are *hundreds* more to choose from.  Enjoy!

Thursday, May 21, 2015

Sixth Grade Shoe Day.

My son had to "invent" shoes for Sixth Grade assignment. He got to my shop after school, I left for a meeting, and here's what he came up with.  Should have taken more pictures but I wasn't even in the room for most of his build!

One minor problem here... Can you see it?


It was pretty funny. I was out back observing the woods teacher and some students finish up for the day on a shed they are building. He came out and said "I've got 2 left feet"... Took me a minute to figure out what he meant!

I drilled the rivets out for him and he finished them up.


They have to wear them all day tomorrow at school. Should be interesting to see how well they hold up! I see a couple of potential fail points- the rivets holding the leather together are probably going to pull out but he'll live and learn.

Only one smushed finger out of the deal too!


I'm pretty impressed. I was worried he was going to cut himself on the metal, but he cut out both soles all by himself with the aviation snips. I sanded off the edges but other than that he designed and built them all by himself out of scraps from the shop.  Took him maybe an hour yesterday to get the soles cut out and he spent almost 3 hours tonight cutting leather, punching holes, and riveting it all together.  I think it took him a while to figure out a latch mechanism on the first one, but the second one seemed to go faster.

Friday, April 03, 2015

Alphatig 200x TIG Welder #3- Welding Steel Sheet!

Haven't had much time to play lately.

Decided it was time to practice a little. Tried something different this time though- switched it over to DC to weld on some steel. With my old welder, this was NOT an easy process. It involved unplugging the high frequency box and taking leads out of it and then re-routing the leads to the correct lugs on the main welder. Might not sound like a big deal but trust me, it was a royal pain.

The Alphatig- Click two switches. Wow, that was easy...


I changed the AC to DC, and the pulse to direct / flat / whatever it's called.


This thing welds steel BEAUTIFULLY. I'm a sucky welder as you can tell, but I was astounded by how easy it was to kludge pieces together. I didn't burn ONE SINGLE HOLE through the 18g sheet I'm using here. Compare that to using my little 110 wire feed where I couldn't run a bead longer than 1/4" without having to stop and let the metal cool, this TIG welder is AWESOME!

First nasty welds, getting it figured out.


Once I understood I could actually put some heat to it and not blow holes the size of Texas, I made some progress. Top is a lap joint, middle is a butt joint, and the bottom is just a bead ran on top of the metal.


The lap joint turned out really nice. Was giving a little forward-back motion as I went and it seems to have worked great.


Time for a little project! This would have been impossible to make on my wire feed welder. Cut a bunch of 2" squares out and tacked them all together. I should also mention tacking things like this together was a breeze. LOVE having the foot pedal.


Not real pretty, but all welded up.


Wish I could spend some time practicing, 'cause I really need it. Got a couple of bigger projects in mind if I can ever get caught up on everything else!

Wednesday, March 25, 2015

Valentines.

Yes, March is nearly over and I'm posting about Valentines day...  Made this for Mrs. Punch.


Doesn't really show well in the pics but I managed to get some neat color patters in it with the torch.  A student of mine wanted to try making something a little different.  She got on Instructables and found a copper rose, but we didn't have any copper.  We experimented with some 22g sheet metal and her's turned out so good I had to make one of my own for my wife.  Must have turned out okay, because she was impressed with it.

I used to always think that my dream "job" would be to be "retired" and be able to just putter around in a shop all day and make whatever I wanted.  I've been thinking about that a lot lately.  I really think that teaching has pushed me to try a lot of new things that I would never have wanted to or even known about had it not been for students asking some silly question or wanting to try something new. 

Its pretty amazing, the things that you learn when you teach.

Sunday, January 18, 2015

Hot Wheels mobile Workshop.

So I've been indulging myself further into my custom Hot Wheels building addiction and figured it was time for a better "workshop". I go back and forth between my home shop and the school shop so I needed something mobile. Here's what I've been using: A cardboard box lid.


As it happens, I'm teaching a class on sheet metal working and we are building toolboxes right now, so instead of demonstrating how to do things on a bunch of scrap metal or one of the students projects, I built my own.

I changed the dimesnions of mine a bit though, the smaller boxes are demo's from another class I teach and I've got DOZENS of them. Made the big box so the little ones fit inside and act as dividers.


I'm pretty limited by the size of the tools in my shop so one way we get around that is by making the sides separate pieces and riveting them in.


Piano hinge installed on the lid.


Box sides in with a "butterfly" (?) bend. This acts both as a handle on the outside and a ledge for the tray on the inside.


Lid installed. Glad I went through this again- forgot to make allowances for the hinge on my box so I had to do some adjusting. Students won't have that issue now.


Primer.


Blue.


Hardware. I mounted my little vice to the top of the lid. We'll see how I like it but for now its on there.


Inside was left grey to make it easier to see bits and pieces.


And hey, its for my Hot Wheels, so may as well put a big 'ole sticker on there, right?!


Not real happy with how the paint came out but that part was a rush job, and its a tool box so it's going to be getting bashed around anyways, right?

Starting on the "organizing" part of it.


Eventualy, I'm going to build a tray for it as well. All of the supplies will go underneath, and the tools will go on top. MUCH better than the stupid cardboard box lid I've been using!