title

Motorcycles, tools, and garages! A little bit of everything mechanical and technical.

Thursday, January 31, 2013

Di Acro Brake Radius Fingers

Got a little more done on my radius fingers.  Made up a quick little jig to align pieces for drilling by zapping a couple of fences on to a chunk of u-channel.  The channel is then clamped down to the drill press table after the first piece is lined up.


Photobucket

Drilled a passle of holes...


Photobucket

Photobucket


Next step was to bend the clamps.  Easily accomplished with a big hammer and a vice.

Photobucket

Assembly!


Photobucket


Photobucket


Installed.


Photobucket

This is only part of the top half.  There will be a support welded to the side that rests against the brake, and the half round of pipe gets welded to the bottom to act as the die.

It seems to work okay, but I need to shim the pipe down a little to get more clamping pressure.  There was one snafu- I was hoping to be able to make compound? bends like the piece below, but the radius of this set bends to much metal up- meaning if I turn the metal 90 degrees from the first bend and try and bend it again, it doesn't fit under the bar where the fingers mount.  Means I'll have to make things in more pieces and then weld together later.  Ug.

Photobucket 

Fun day at school today- had a practice lockdown drill, and they did it between classes (students all out in the halls).  I thought for sure about half the school was going to get stuck in the hallways, but it sounds like everyone got in a room- even if only 3 made it mine!!!
 

Tuesday, January 29, 2013

MakerGear Plastruder Assembly

Began assembling the "plastruder" from MakerGear today. This was one of the more expensive pieces, which I guess is understandable as it is the business end of the printer. I bought it in kit form here: http://www.makergear.com/products/plastruder . For only $10 more I could have gotten it with a pre-assembled hot end, and having mostly built mine now I think the extra money is a bargain unless you really enjoy teensy wires, solder, and wet ceramic paste.

Maker Gears instructions were pretty good, and can be found here: http://www.makergear.com/pages/stepp...r-instructions . There were a few things that I found confusing, mainly putting the larger pieces together, but overall its pretty straight forward.

Start by assembling the hot end. This is covered nicely already in the link above, so I'll just include a pic or three of what I did.

Start with this little ball in the center, attach clips to it, attach wires to the clips, and solder. The little ball is a piece of brass with nichrome wire wrapped around it and a first coating of ceramic already applied.


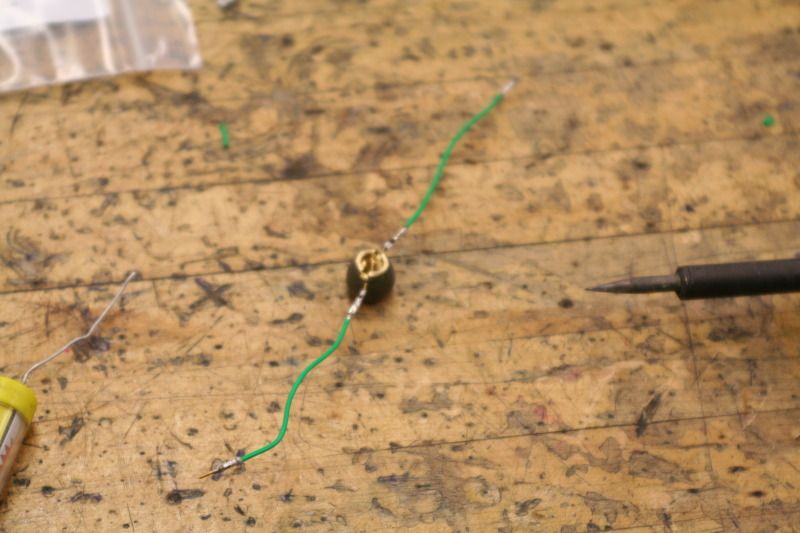
Thread it onto the included bolt and washer (these are only used to hold the pieces together while putting the paste on).


Apply goopy paste.


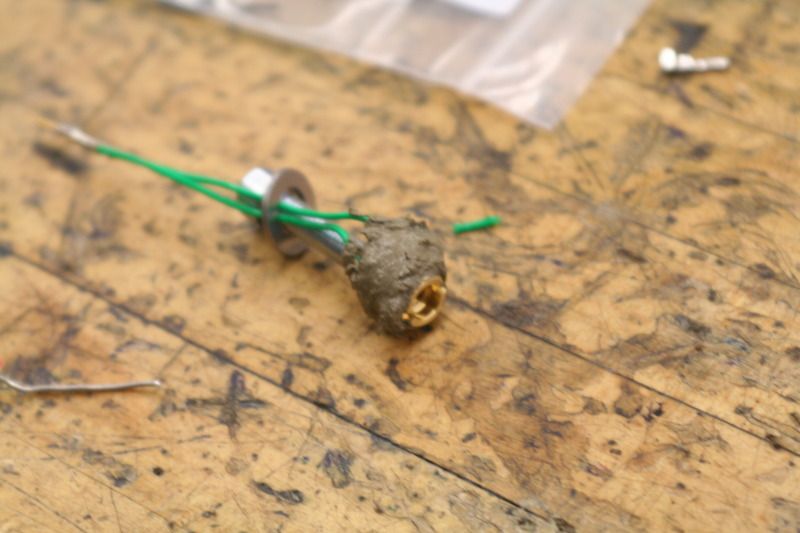
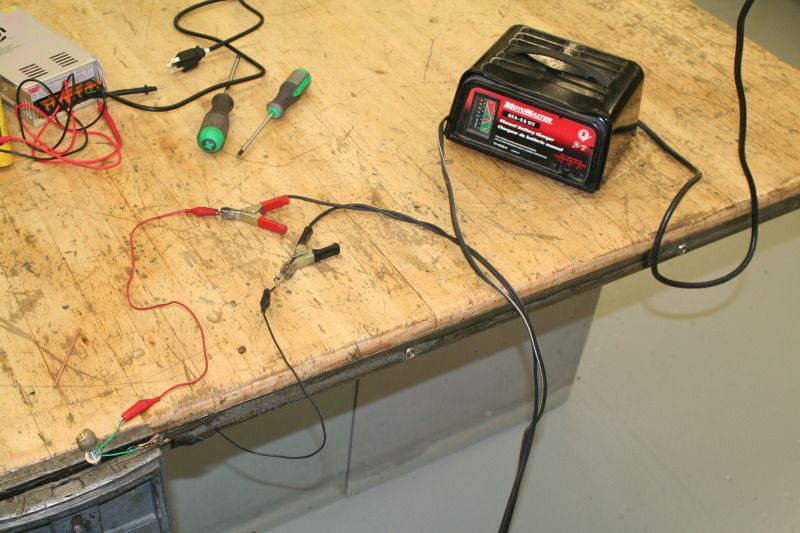
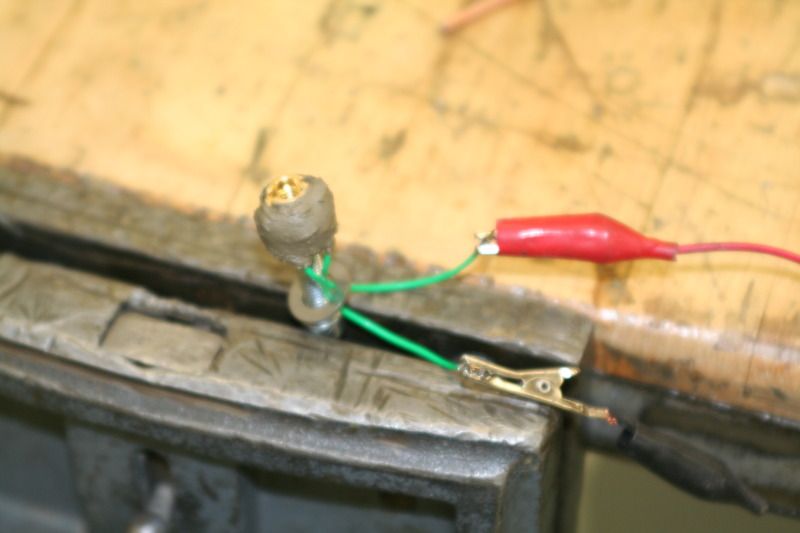
The paste looks ugly but when you cure it it smooths out nicely. To cure it, you have to zap it with 12 volts for 2 minutes to heat it up, then let it cool, then repeat several more times. The heat cures the ceramic and hardens it apparently...


Putting it all together was a little confusing to me, but it was pretty easy to figure out.

The directions for this part were pretty straight forward.


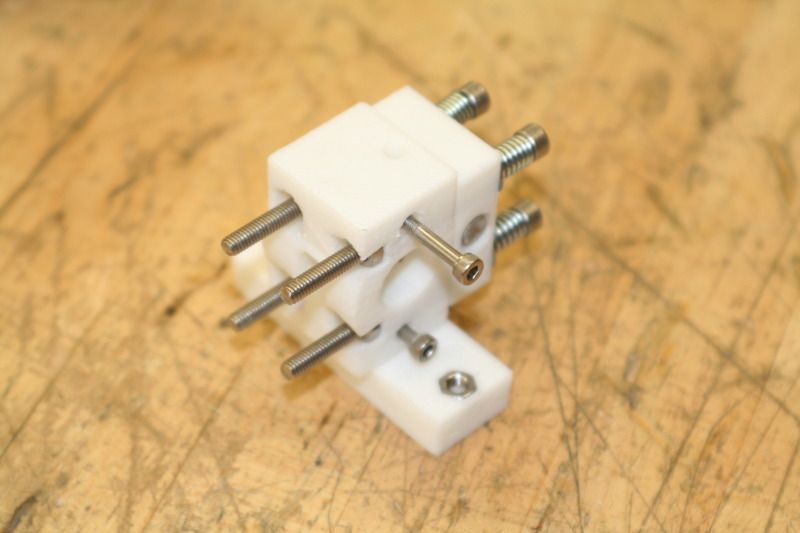
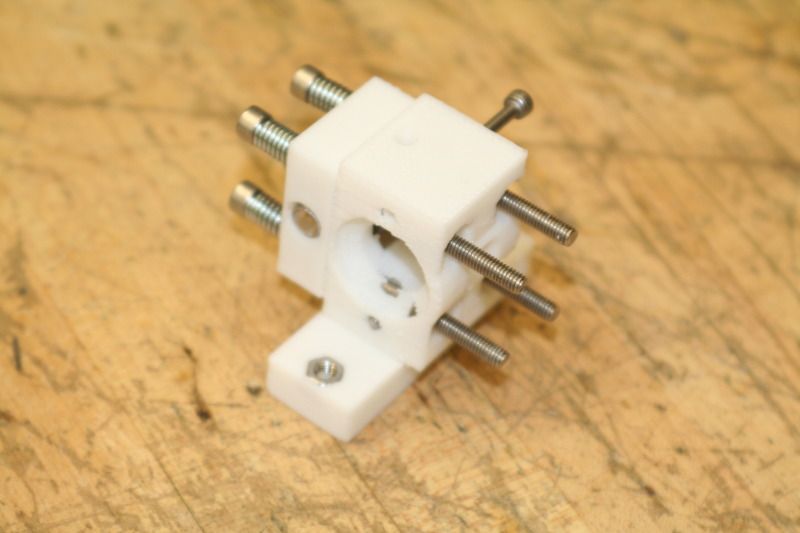
On their website they have about 4 different choices of assembled plastruders, and none of them seem to match exactly what I have, so 
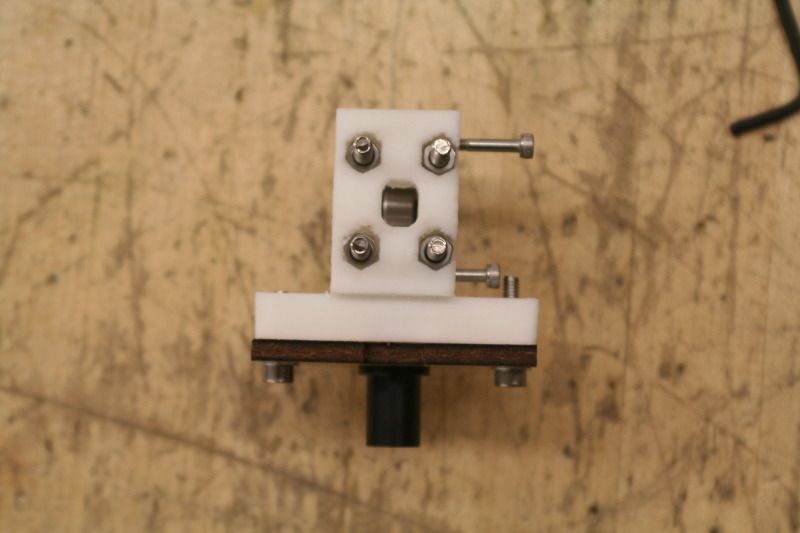
here's what I figured out. Here's all of the parts in an exploded view.


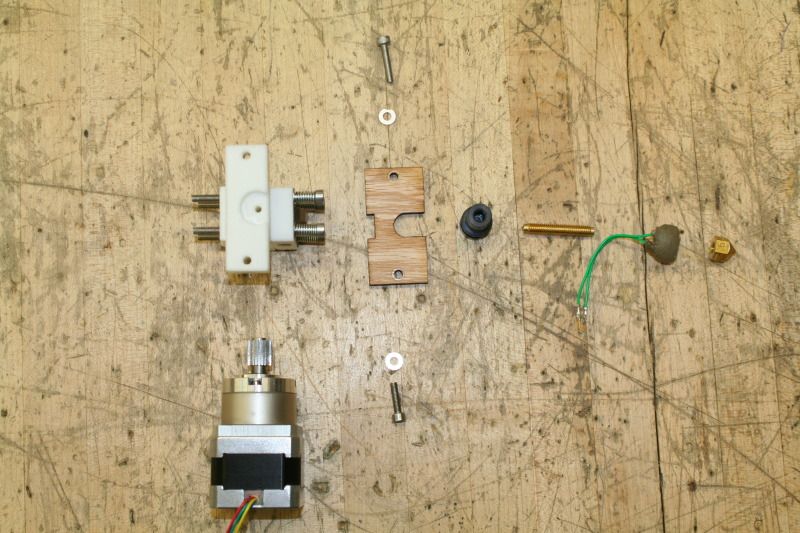
Follow the pics, its pretty straight forward. The black plastic tube gets slid into the notch in the wood. Notice the screw in the bottom of the pic is shorter than the one in the top... Thats important in a minute.


The wood plate is attached to the plastic extruder block.


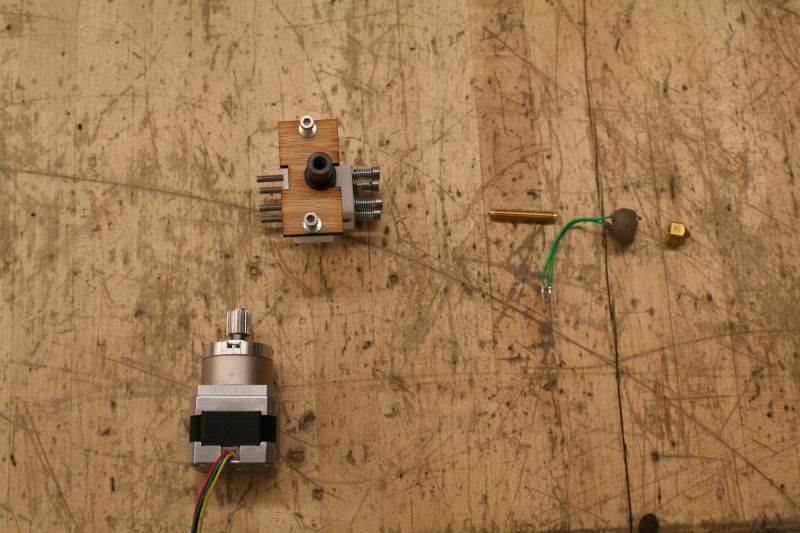
See the shorter screw? Don't know why they didnt just use 2 short ones...


Install the stepper motor. The one screw is short so it doesnt hit the motor.


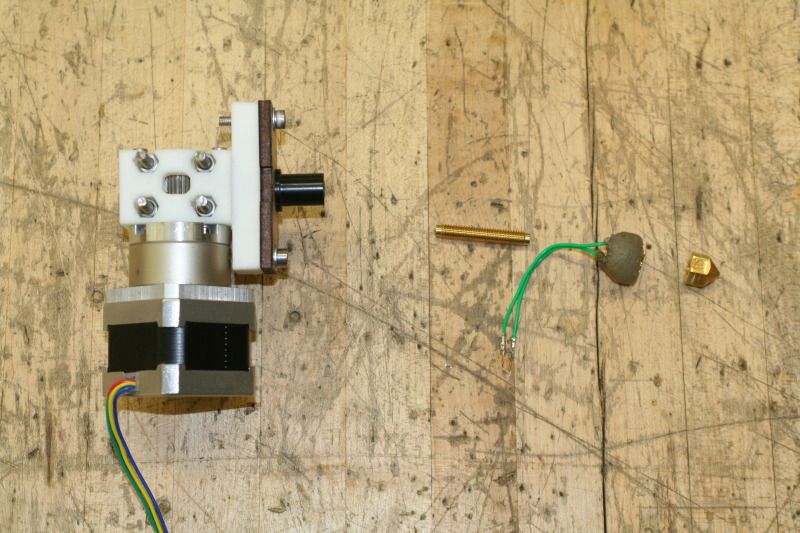
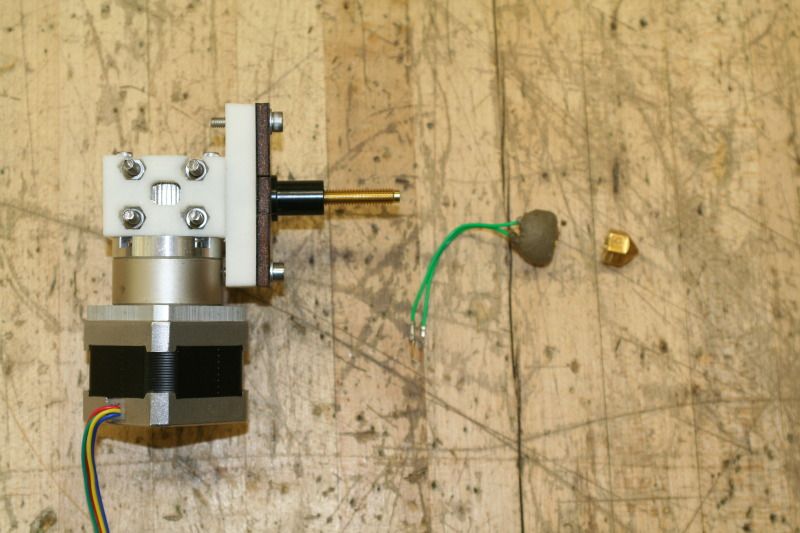
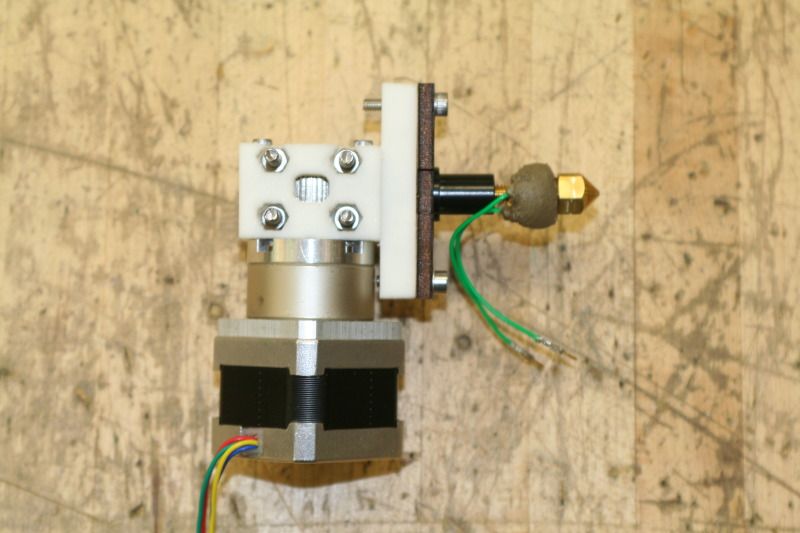
The rest of these pics just show the innards of the hot end. Once the hot end is complete, its not really something you take apart. It's designed so that you just take the wood plate off, and everything from the black plastic tube to the nozzle comes off as one piece.


Still needs the temp sensor and covering installed.  Plan on letting the ceramic cure overnight, and zap it a few more times tomorrow just to be safe and then finish it up.
 

Thats where I'm at now. Tomorrow I will finish the hot end with the temp sensor and wiring, and them I'm out of stuff to do until the rest of the printer shows up- probably not until the second week of February.

I figured it would be a good idea to record the time I've spent on this. I'm only going to count the time I spend working on the printer- not counting time spent sourcing parts, scaring up funds, figuring out software, etc.

So far, with the assembly of the plastruder and wiring of the power supply I'll call it an even 2 hours. This DOES include time spent re-reading the instructions and double checking I was doing things right.

Time today: 2.0 hrs.

Total Time: 2.0 hrs. 

Monday, January 28, 2013

Printer Parts!

Parts started showing up today!  Got the stepper motors, the power supply, and the plastruder.


Photobucket

I bought a few limit switches with the stepper motors, not sure if I will end up needing them or not.  The power supply looks pretty straight forward, although it looks like it got dinged in shipping- one corner is a little bent.  The plastruder... "Some assembly required".  Looks like fun!

Here is what a plastic printed part looks like.


Photobucket


Still playing with the edge former, starting to get some decent results.  Here is the "speed bump" for the back of the seat on my cafe.  The cover will be cut off on the bottom and attached to a piece of wood that will act as the seat base.  It will be hinged so the cover can swing forward- plan on storing a small can of premix in there just in case.  Not sure what the back will look like, but plan on having a tail light inset into the bump.


Photobucket

Photobucket

I have got to get better at takin pictures... 

Friday, January 25, 2013

Edge Forming.

I suck at it.  Had an idea for a quick little project to try and get better at using my edge forming machine.  I gave up after practicing with a few scraps but the project came out great anyways!


Usually things like this end up as scrap when I touch 'em.

Drew up a shape on a piece of paper real quick, traced it onto some aluminum and hacked it out.


Ran it through the slip roll to give it a bit of a curve and tried it on with some duct tape. I did run a bead around the edge with the edge former, 'bout the only thing I can do with it.


Did a little creative measuring... Made some brackets to mount it to the headlight ears, and viola!


Now maybe someday I'll start on the tank...

In other news, I get to wake up at 4:00 a.m. tomorrow, sit in a car for 2 hrs with a bunch of 8th graders, spend all day at a lego robotics tournament, and then come home.  Yay.  Ahh, who am I kiddin, its going to be fun.  I'm sure I'll have pics to share of the event in the next day or two, hope they do a great job!

Tuesday, January 22, 2013

The first 3D printer in Blackfoot, Idaho?

After about a month of going back and forth, scrounging, dickering, begging, borrowing, and stealing (not really... at least, not yet), I ordered parts today to build a 3D printer for my classroom.  Sure hope this works out, because if I don't get reimbursed for this my families gonna be eatin Ramen for the next year...

Makers Tool Works (http://www.makerstoolworks.com/) has been wonderful to me, working with all of the headaches that come with trying to get money from a school. They agreed to get me a kit for the brand new Mendelmax 2.0!  It all came together and I was able to get one of last 3 kits (from the first run of 50).

This is something that is totally new to me, so I'm pretty excited to get parts and figure this all out.  I've been doing a fair bit of reading and talking to several different groups of people.  I figured I would post here the components I've ordered so far, which from what I can tell *should* be everything I need.  Here's the list:


Mendelmax 2.0 Build


Printer Hardware Kit
$715.00
http://www.makerstoolworks.com/
Stepper Mtrs & limit sw. (4)
$84.35
http://ultimachine.com/content/kysan-1124090-nema-17-stepper-motor
Print Controller & Stepper drivers $99.00
http://www.indiegogo.com/rumba
Power Supply
$27.33
http://www.amazon.com/Switching-Power-Supply-Transformer-Regulated/dp/B006QSOF60/ref=sr_1_9?ie=UTF8&qid=1356922701&sr=8-9&keywords=24vdc+power+supply
Plastruder (3mm)
$170.00
http://www.makergear.com/pages/stepper-plastruder-instructions
TOTAL:
$1,095.68


I was able to get a bit of a discount on some parts because this is a "Beta" version and it is going to a school.  The prices above are actual prices a normal person would pay.  There are dozens of other options as far as electronics go but I decided to go with the basic (and cheaper) recommendations- it appears that if I want to in the future it is very easy to upgrade. I ordered the kit and all of the parts today.  Can't wait to get on this project!  Wish I had the parts right now...  Not much I want to do in the garage when the thermometer in the car reads -9 in the morning on the way to school and maybe 20 on the way home.  Brr.


Friday, January 18, 2013

Year Book.

The year book students have been coming the last week to take pics of my different classes.  I think a couple of them turned out great!  Looking back at them this afternoon made me realize what a huge variety of classes I teach- wouldn't have it any other way.  Love being able to mess around with all these different things all day long!  These pictures don't show any of my Tech and Design classes either!


Photobucket

Photobucket

Photobucket

Photobucket

Photobucket

Photobucket

Photobucket

Photobucket

Photobucket


Photobucket 
 Guess the photographer has a thing for close-ups.  Love the welding ones, they turned out great.  Trimester is half over- had Parent Teacher conferences last night, midterm grades are all turned in, and now we get a long weekend.  It's flying by, we have waaayyy to much to get done in the next 5 weeks!

Hoping to have something to report back on the 3D printer by next week.  Sounds like I've got the okay to get one- the question is whether or not its going to be  Mendelmax 2.0 beta version or a good 'ole 1.5.  Hoping to hear back from the guys at http://www.makerstoolworks.com/ soon!

Tuesday, January 15, 2013

Repetition.

Getting to the point where I can do these in my sleep... These are the "labs" I have my sheet metals students do before they can pick a project.  The first is a Joining Lab, where they get to practice measuring, marking, cutting, bending, and different joining processes.  I've thrown dozens of these out but they seem to keep showing up, usually whenever I have a metals class going on.  The boxes I tend to save- they make great organizers in all of my drawers and lockers.


Photobucket


Today was our last flight day for the rubber band powered airplanes.  Had maybe a little more than 1/3rd of the 14 or so airplanes make it through all of the days looking like they can still fly.  Kids can be pretty rough on a "gentle" toss.  That, and meeting a brick wall 20 feet up can cause some damage!  They tend to get excited and toss them too hard, meaning they shoot straight up in the air.  Three of the planes below are headed for a good crash landing...

Photobucket

Photobucket

Photobucket

Photobucket


Photobucket

Kinda hard to get pictures of them in the air.  The gym has some huge air vents in the ceiling and they create some serious turbulence.  Makes for interesting flying!  I always enjoy teaching this unit and it seems like the kids do too.  Test tomorrow and then we move on to Lego Robotics.

Still dabbling with the TIG and aluminum.  Trying to get at least 15 minutes a day in, and I've been getting at least that.  My little 1/8" sheet of aluminum is now almost 1/2" thick, and I got a darn near perfect bead on some 20 gauge.  Course, when I tried to replicate it on a fresh piece so I could take a picture, I was running too slow so the base metal got too hot giving a poor finish.  At least I'm not burning holes anymore.

Might be MIA for the next few days-  my book showed up which means I have 909 pages to get through!