

So I don't follow sports. At all. Not even the gear head "sports"- Nascar, MX, etc. Don't get me wrong, I love the science and engineering behind all of it, but I just don't have time for that sort of thing. That was, until last year. I discovered the Reno Air Races through the coolest bird I've ever seen- a highly modified P-51 Mustang.
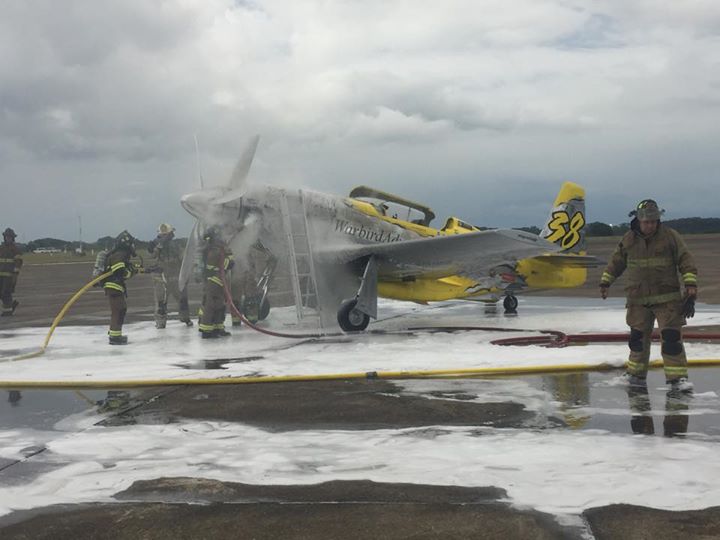
They had a pretty good run last year. This year, only a few hours from their home base in Florida, the plane caught fire on the ground at a fueling stop.
At first, it sounded like the goose was cooked. The cost involved with getting her back in the air was astronomical. However, it seems I wasn't alone in my love for this plane- there was a tremendous outpouring of offered help. Thom Richard, the pilot, retracted his statement about the days of Precious Metal being over, and issued this statement:
"Dear Race Fans,
Precious Metal is more than an airplane; she's larger than life. You have all proven it since our ground fire incident mere hours ago. The groundswell of support is humbling. So what are our options? We could throw in the towel and move on from this tragic chapter and leave the world wondering what could have been.
Or...
We could, in true Team Precious Metal fashion, NEVER GIVE UP! Precious Metal does not deserve to be parted out and disappear into the history books as a failed attempt at the World's Fastest Motor Sport. She deserves to rise out of the ashes in true Phoenix fashion and prove her worth!
Everything is repairable; it's all a matter of capital. If we can raise the necessary funding to make this happen, she will race again!
Many things have to be repaired: wings, fuselage, engine, systems, cowling and last, but not least, her famous paint scheme. The Precious Metal program is run on countless hours of dedicated volunteers and a shoestring budget. This most recent set back is too much of a financial burden for the program to handle. As we know, a setback is just a setup for a comeback. Which brings us to our proposed solution. Here's Team Precious Metal's offer to you, our fans and supporters:
We will give you one square inch on Precious Metal for a donation of $50 towards our rebuild. We will fly your picture around the course embedded in our new paint scheme and you can be part of resurrecting one of the most iconic race planes is history.
Team Precious Metal will be in Reno this year. We will have our pit and sell our team gear. Chances are we'll provide some evening entertainment as well. Come see us there and purchase your squares!
There are several ways to support our cause: through our Precious Metal gear sales, our newly invented onboard picture program, or by supporting our sponsors and purchasing their products.
There's no limit as to how many square inches you can purchase, we'll just make your picture larger! Or submit pictures of friends, family, pets or whatever you desire. Precious Metal is the people's racer. And with your support she will growl around the course again!
Make your mark in air racing history here:
US fans: https://squareup.com/market/AirRaceTeam
Foreign fans: http://warbirdadventures.com/inc/sdetail/160/3086
On a personal note, air racing has been the most rewarding experience I have ever had. Not in the form of trophies and bragging rights, but in the form of enthusiasm, excitement and dedication of the fans and crewmembers. It's been a magical life experience, which I've been very fortunate to be a part of. We, as a team, will do whatever it takes to keep the dream alive. Please join us in making history and carrying on the legacy of the World's Fastest Motor Sport!
Thank you for making it possible,
Thom Richard"
I'm writing this in hopes to see this incredible plane back in the air again. Do your part, help out if you can! Hoping for blue skies again for Precious Metal!
They have also set up a gofundme campaign here: http://www.gofundme.com/dg4s583w


