title

Motorcycles, tools, and garages! A little bit of everything mechanical and technical.

Showing posts with label Machining. Show all posts

Tuesday, March 19, 2013

Future Project, help wanted!

Alright, so some friends of mine approached me and asked me to build the a bicycle trailer that they can carry their son, Dan in.  Dan is about 35 years old and mentally handicapped.  The trailer is going to have to be strong enough to carry him, light enough to be towed, and safe.

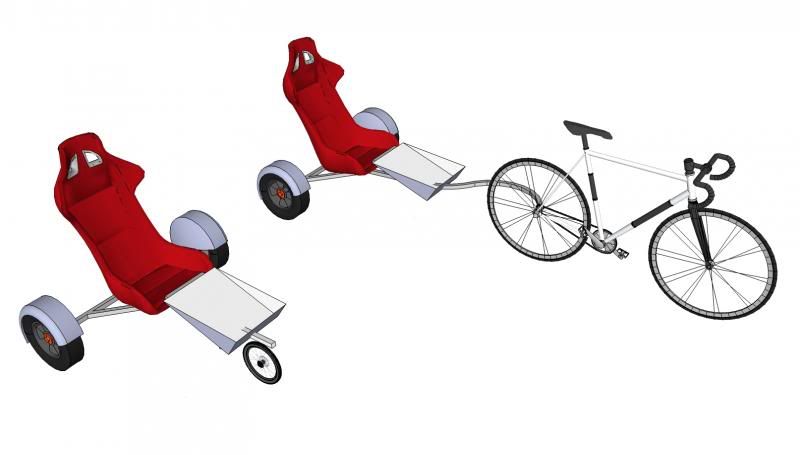
I've been kicking several ideas around for the last week and playing around on Sketchup.  Here's what I've come up with.  Remember, these are JUST ideas at this point, I really don't know much about bicycle trailers but I'm learning a lot along the way, and would love to hear it if anyone has any suggestions.

First sketches:


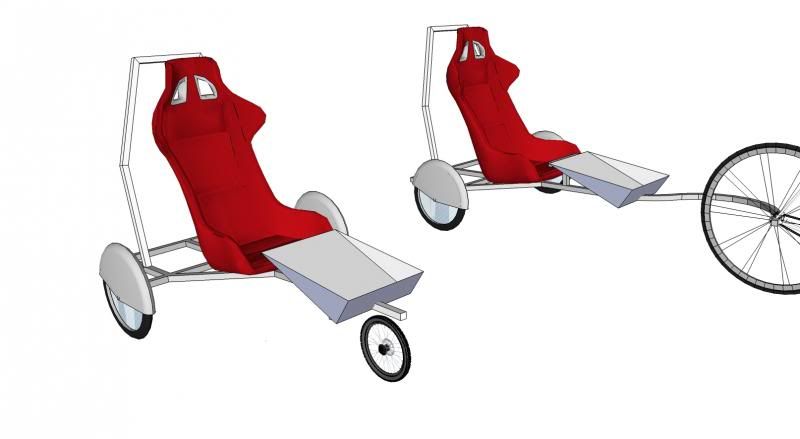
Real rough.  As you can see from the next few sketches, a lot has changed.  Kicked around a few more ideas, and discarded a few others.

Small tires, with a stroller version. Will be using bike tires, so this is moot.


Seat suspension. Probably won't be doing this.


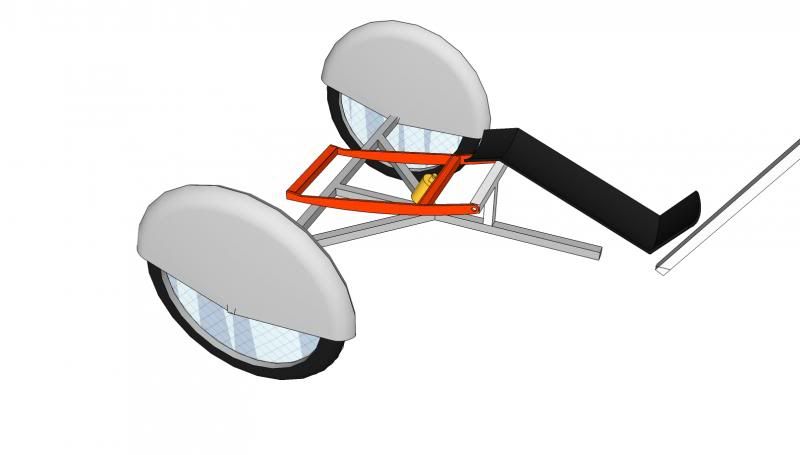
Extended frame for adding a basket or carrying stuff.


Rollbar / pushbar for stroller.


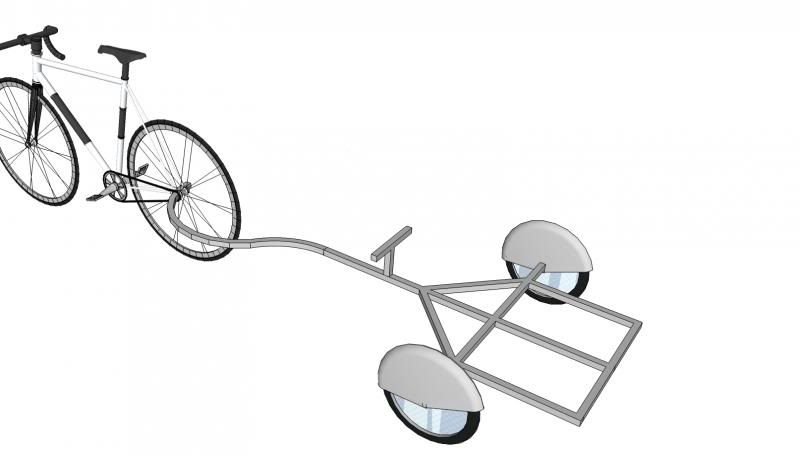
Stroller, with detachable tongue / attachable caster wheel. Tongue stows under trailer.
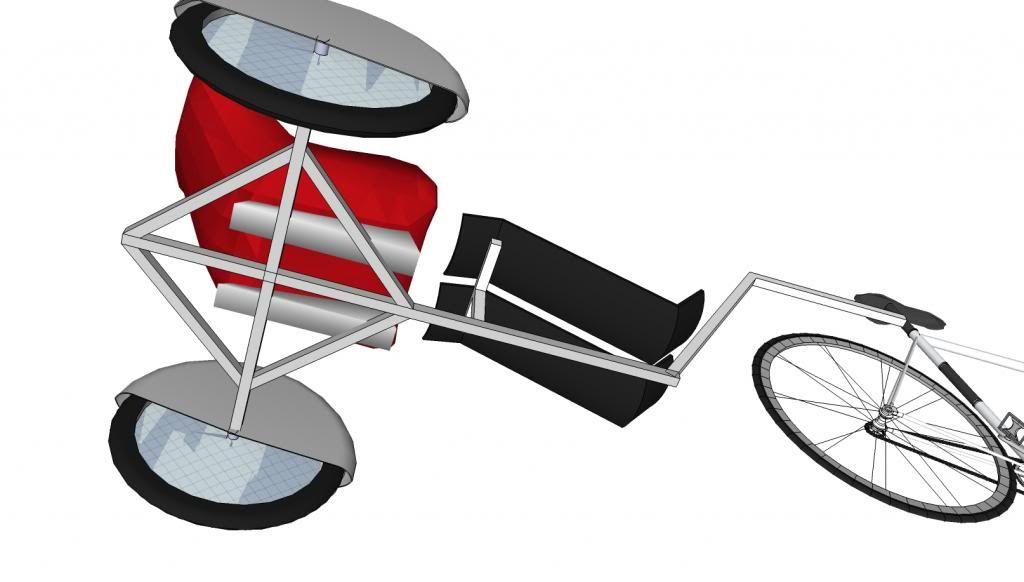
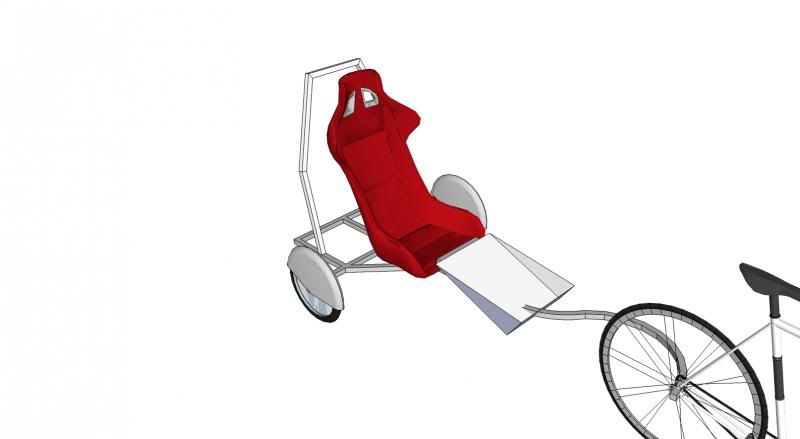


Other pics.


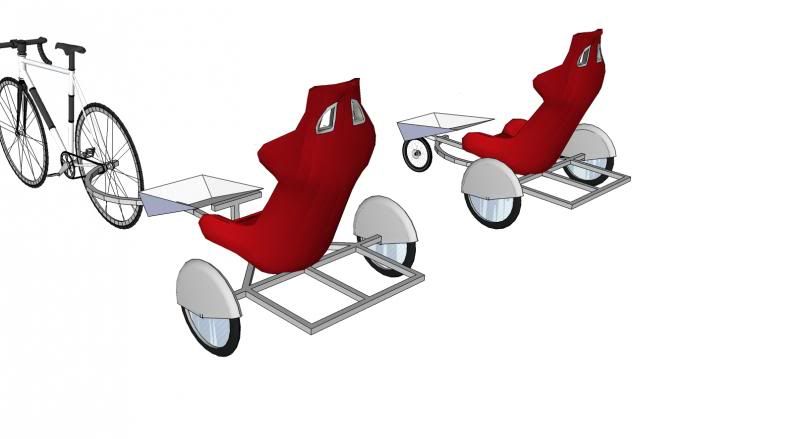
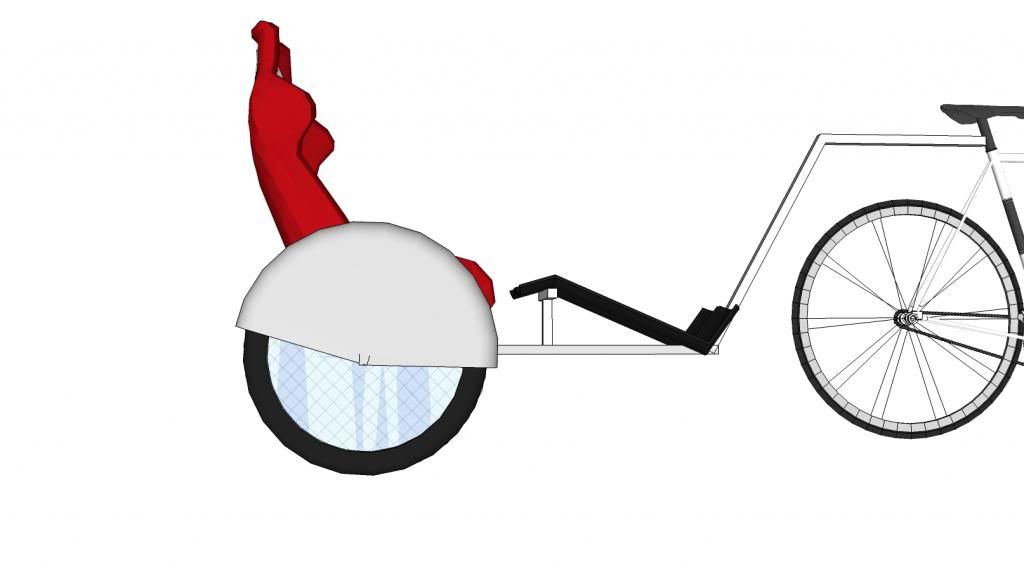
Keep in mind these are just design ideas... The trailer will likely be skinnier (this model has a 3' wide frame, will probably cut that down to 2') and change a bunch while building. Sounds like they really want me to build it, so I will, but there are a few other projects on the table and a few other things to iron out here first. May start on it over spring break, we'll just have to wait and see. 


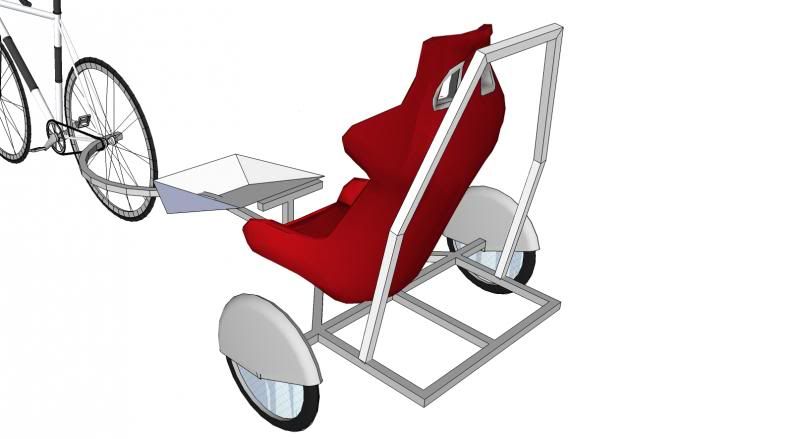
Current things we have decided on: 

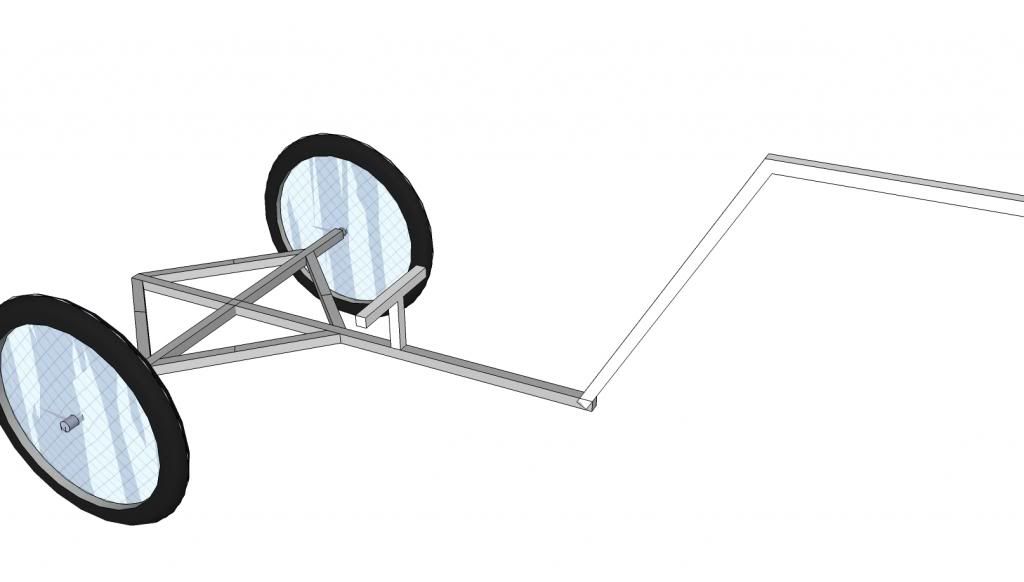
Bicycle wheels for sure.  Probably 16", as I've read the smaller tires handle cornering forces better?

Low side mount tongue.

Some type of platform off the back to mount a basket or case of some sorts.

Fenders for the pull bicycles- Store bought.

Fenders for the trailer- going to try hand making them out of aluminum sheet, but no cover on the outside.

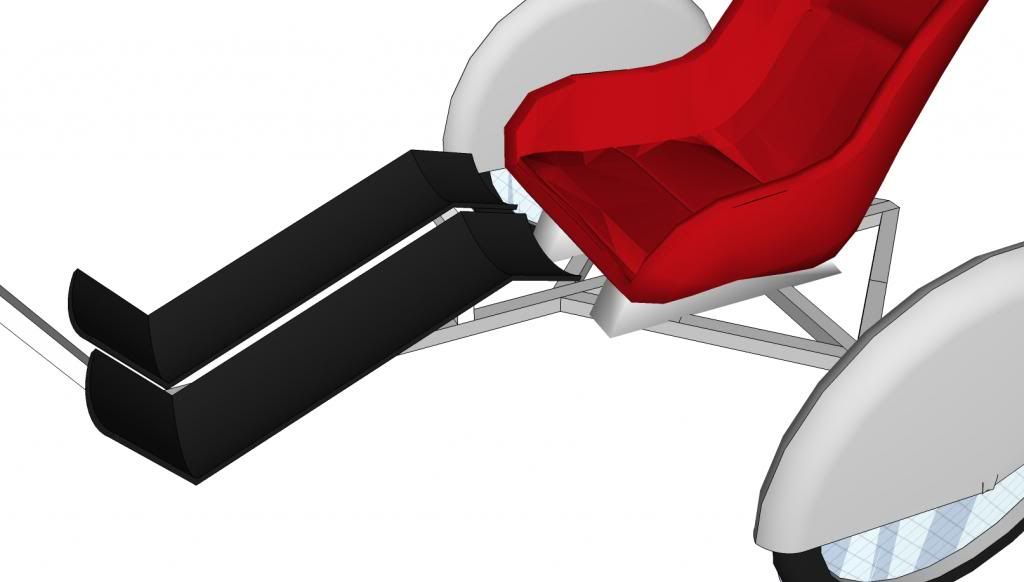
Rotomolded racing seat from JEGS, with a 5 pt harness.

Leg board most likely also hand made by me out of aluminum sheet.


Things they seem to maybe want:

Seat suspension

Stroller castor / removable tongue

Powedercoated frame.


There you have it.  I want to try and keep very little weight on the tongue, so the seat position will likely move back.  The axles will be 5/8" rod welded to the top of the frame crossbar to lower the center of gravity more.  I will probably have to build some type of bracket behind the seat to mount the safety harness too as well.

Anything I'm missing?  Or, I know I'm missing about thirteen hundred things, wanna enlighten me on a few?!

Wednesday, February 06, 2013

Student Projects

Just finished up the Lego Robotics unit with my Tech and Design 2 class.  They did a great job for how little time we had to build and program!  Wish I could have had them work more closely with my FLL Teams, they could have taught each other a lot.


Photobucket

Photobucket

I let them do a demolition derby before we took them apart... They quite enjoyed that part.


Also got the first batch of air engines done!  We have several up and running, but they were dissassembled for welding.  Mine is the one on the left, the other two are students.  Not bad for a bunch of 8th graders!


Photobucket

The end of the tri marches ever closer.  Just started leathers in one class and bicycle repair in another- LOTS left to do!

One last thing- real quick update on the Mendelmax 2.0.  I got an email from Maker Tool Works the other day saying they had discovered a bug in the beta kits and were in the process getting parts made to fix it. I opted to have the original parts shipped now so I can start assembling- the new parts will be free of charge other than shipping- part of the deal with it being a "Beta" kit.

The kit wasn't even originally supposed to ship until yesterday, so they aren't too far behind. I understood up front that the printer is still under development and that this was a possibility, so I'm not too worried. Still havent seen hide nor hair of the drivers and controller board though... getting a little worried about that.  Hopefully more info coming soon!

Monday, February 04, 2013

Di Acro Radius Fingers, Part 3.

Finished them up, and they halfway work!

I made another pipe just like the one in the last post, and added a few extra bar mounts.  The next issue I had to overcome was the fact that with spring back, the brake wouldn't get me anywhere near a 90 degree bend.  Of course, that means drilling more holes and cutting more pieces.


Photobucket

Photobucket


I attached those pieces to the folding blade...

Photobucket


And then welded a rod to them that sticks up maybe 1/4" above the edge of the blade.


Photobucket

The idea being that the bar is up higher than the top of the fingers, and can push the metal being bent past 90 degrees to accomodate for spring back.

Seems to work...


Photobucket

Photobucket

Photobucket

Photobucket


Those are pics of an aluminum tank I'm working on for my "cafe" racer...  First attempt.  I doubt it will turn out the way I want it, but thats the way the learning process goes.  Gotta make scrap sometimes to make something nice. 

I'm hoping to use the radius fingers for tool box lids, but they are definitely going to need beefing up first.  On my list of things to do.


Friday, February 01, 2013

Di Acro Brake Radius Fingers, Part 2

Little more done on the radius fingers.  Cut out and welded a cover over the pipe to make it a little more rigid.  When I was testing it, when I clamped the pipe it squashed out a little bit.  I also needed to make the whole thing a little thicker to get more clamping pressure.


Photobucket


Next step was a little more tricky.  Attached two of my mounts, set the pipe in, and lined it up by lifting the folding blade up until it pushed the pipe back evenly.


Photobucket


Couple of quick zaps with my little 110v wire feed and viola!

Photobucket

Photobucket

Still have another mounting bracket to add in the center, and I'm going to make one more just like it but I'm going to cut it up into shorter lengths- maybe a 6" and two 3" fingers.  They will also all get additional supports and more welding, but for what I plan on doing with them even the way this first one sits is probably good enough.


Thursday, December 20, 2012

The Infinite Loop...

Sometimes it feels like I start one thing, only to realize I need to do something else to get that thing done.  So I start on that job, only to discover that in order to get it done, I need to do something else.  If I want to get that thing done- you guessed it, I have to get the original project finished.


I'm stuck in an infinite loop right now...  I'm trying to build some radius fingers for my box and pan brake.  Got it all figured out, cut a bunch of pieces of metal out, and decided that if I wanted to be really accurate drilling the holes for the clamp bolts, I oughta build a fixture for the drill press.  No problem- I have a decent size piece of channel to use as a base plate and a few chunks of half in. bar stock to use as a fence.

Radius finger parts:

Photobucket


Parts to make a drilling / welding fixture:

Photobucket

Heck, while I'm at it, why not make it adjustable?  One fence should be able to swing so I can use it as a fixture for welding pieces together at angles... That'd be handy, right?

Turns out my band saw isn't quite big enough to cut the channel.  No problem, just modify it a bit with a grinder.  After several fine "adjustments" with the grinder, it *just* barely cuts without the guide wheels snagging on the metal.  I've been meaning to do this for a while- seems like the saw is just barely too small more often than not.


Photobucket

Photobucket 
 This is where it gets interesting.  I have a (what I thought to be) decent little mill / lathe in the shop.  I figured I could chuck that piece of metal up in there and cut an arc for the adjustable part of the fence.  Before I started teaching the mill was next door in the woods shop because the previous teacher had no interest in it.  Needless to say there was NO tooling for it.   I've picked up some ultra cheap (read:  cheap Harbor Freight crap) to experiment with over the years as I had a little extra money.


Promise not to laugh?


Photobucket 
 There's a decent Smithy vice barely bolted to a H.F. turntable, held precariously to the cross feed with another set of H.F. clamping blocks.  Lets just say this little experiment had less than satisfactory results.  The mill has a LOT of backlash and tends to shake itself out of position in all three axis.  PLUS- turns out the channel I am trying to use for the fixture is WARPED?!

Wait, where was I? Oh yeah, building radius fingers for the brake...

Friday, November 16, 2012

Mikuni Mouse

Absolutely no plan in mind... Just start cutting. 

So I had an old carburetor I wanted to cut up to make a cutaway.  I started cutting and realized I would have a fairly large chunk leftover.  I have no idea how my mind finally arrived at this particular destination, but as luck would have it a computer mouse and a Mikuni Carburetor were about to cross paths.

Had this mouse that worked, but had some loose buttons.

Photobucket

Had this carb I had cut up...

Photobucket

Cut the mouse up a little more.

Photobucket

Machine a bigger hole in the carb.

Photobucket

after GOBS of mucking around- the final set of parts.

Photobucket


Assembled and working!

Photobucket

Photobucket


Photobucket