
Alright... so here's the how to get drivers / firmware uploaded... After spending 3 frickin hours last night trying to get this to work only to discover a bad usb cable this morning. Not going to count that 3 hours in the overall time either.
First step: Download the RUMBA drivers from here: http://reprap.org/wiki/File:RRD-RUMBA_USB_DRIVER.zip
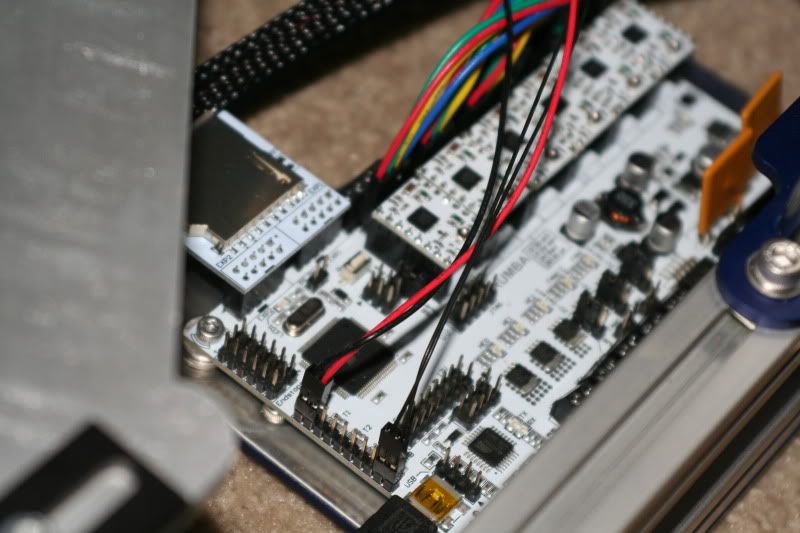
This part isn't required, but by switching this jumper you don't have to have the printer plugged into power- the RUMBA board is powered by the USB. You can just barely see the pin over the red wire, next to the x axis stepper driver. It's pretty clearly labeled- one side says stand alone, the other usb power. Switch it to usb power so you don't have to have the printer plugged in.
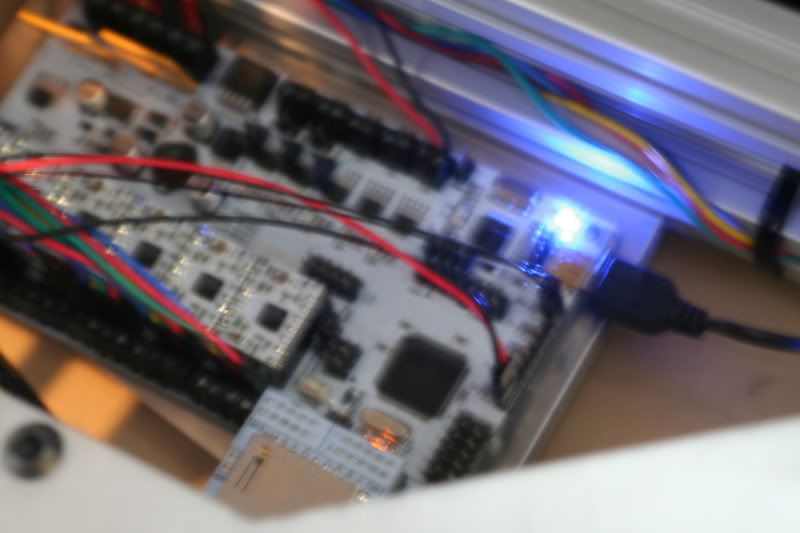
Plug the usb cable in, and you should get a nice blue light on the board!
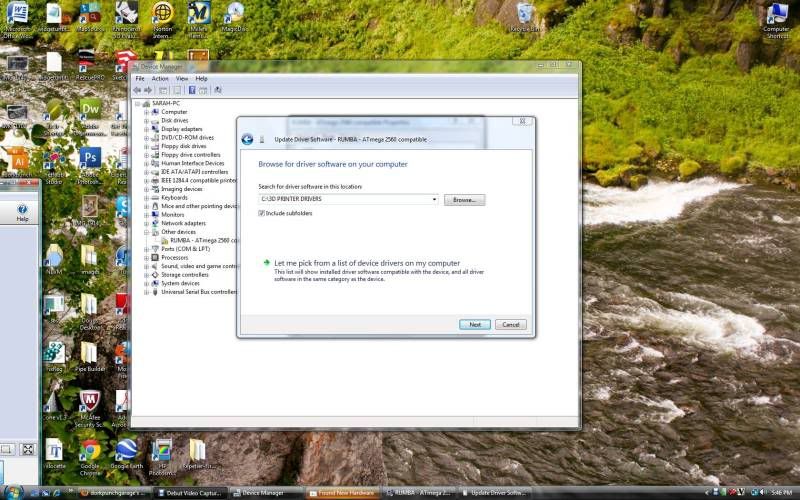
Time to install the drivers. Remember were you saved them to! If when you plugged in the usb you got a message saying unrecognized device, click it and choose either properties or update drivers. If you missed it, open the "Device Manager" in Windows, and you should see on the list something like this:
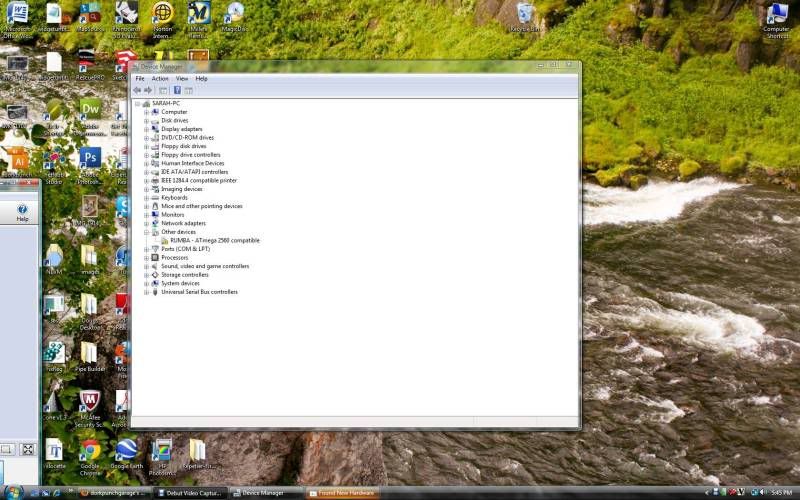
See the RUMBA xxxxxxxxxxx with the yellow mark under Other Devices? Right click and select either properties or update driver.
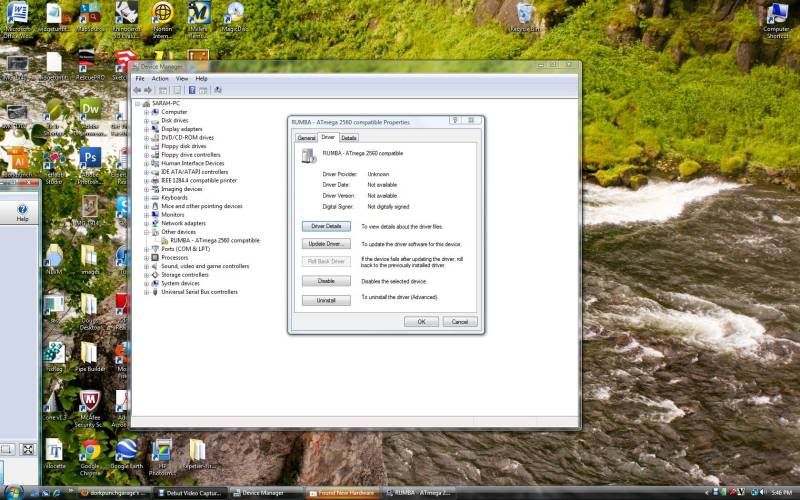
Go through the prompts and show it where you saved the drivers to install.
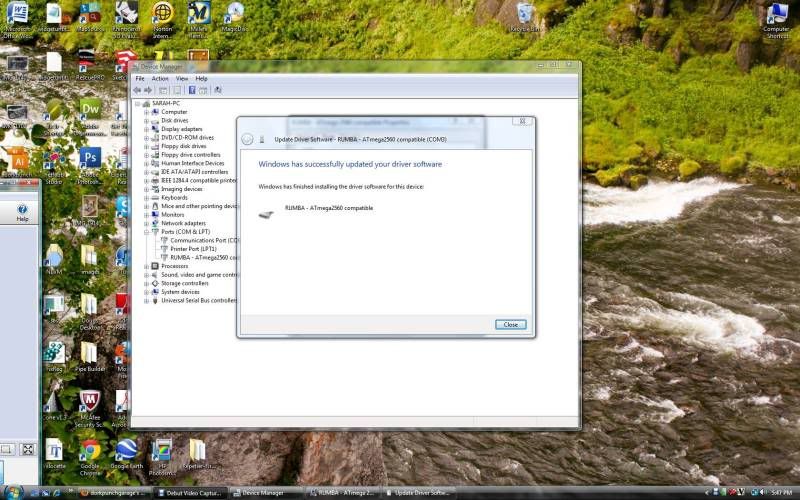
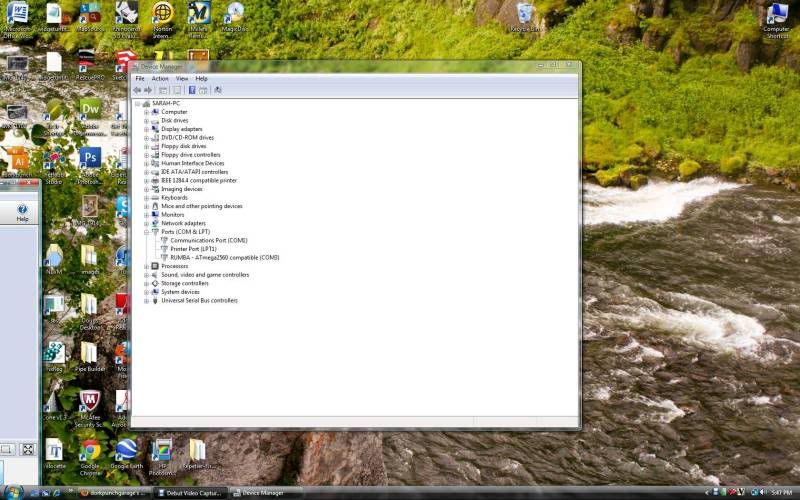
There it is! MAKE A NOTE OF WHICH COM IT SAYS IT'S USING!!!! In my case, it is set to COM 3.
Next step. Download and install the latest arduino IDE- here is the most current version at the moment: http://code.google.com/p/arduino/downloads/detail?name=arduino-1.0.3-windows.zip
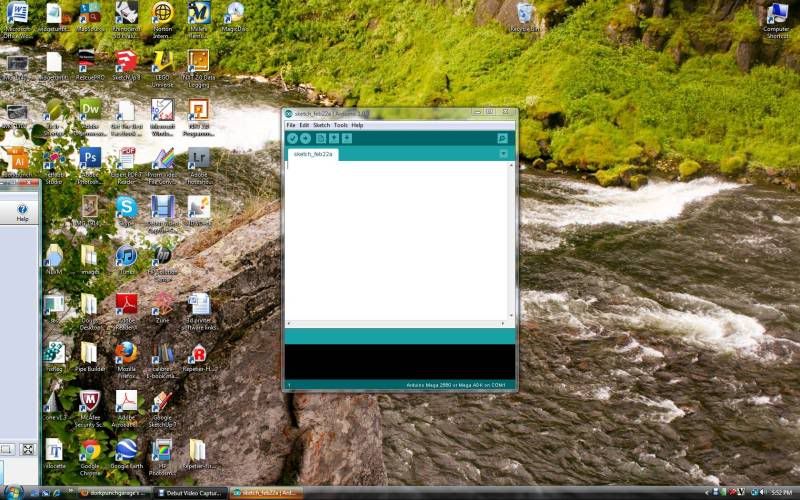
When you run it it looks like this:
Next, download and install the Marlin FIRMWARE. BOTH are available here: https://github.com/ErikZalm/Marlin/tags
When you unzip it it gives you a folder full of weird files like this:
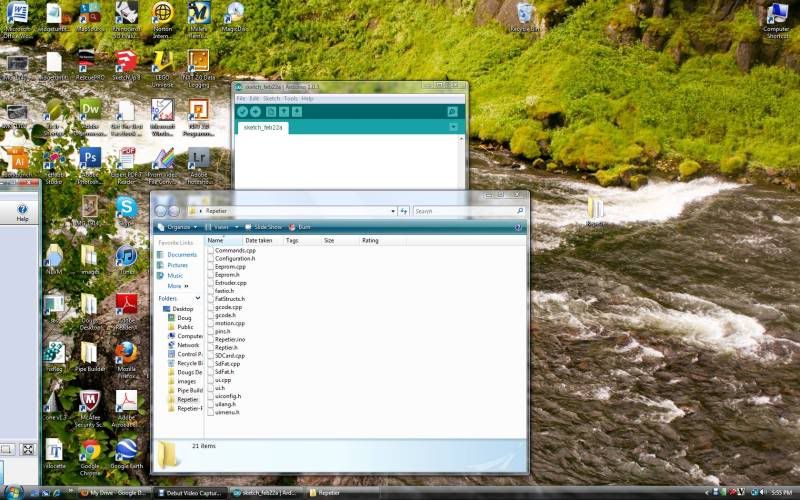
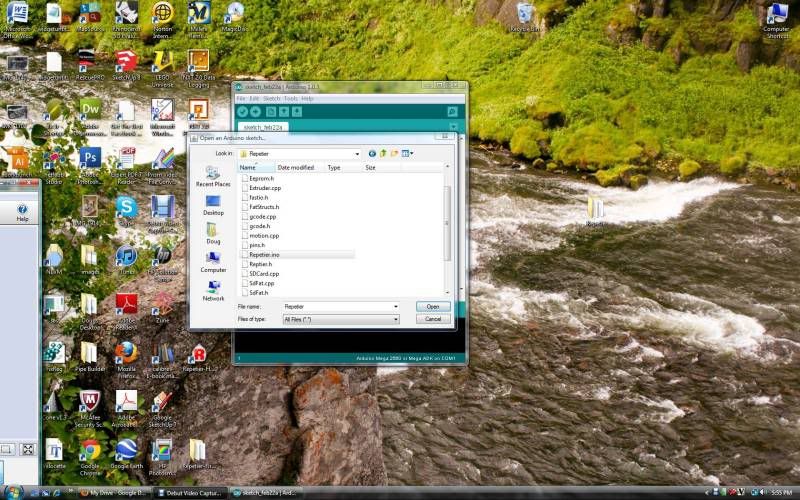
Go back to the Arduino software, and using it, open the marlin.ino file in the firmware folder you just unzipped. The pic below shows the Repetier firmware, which should also work but will have some differences.
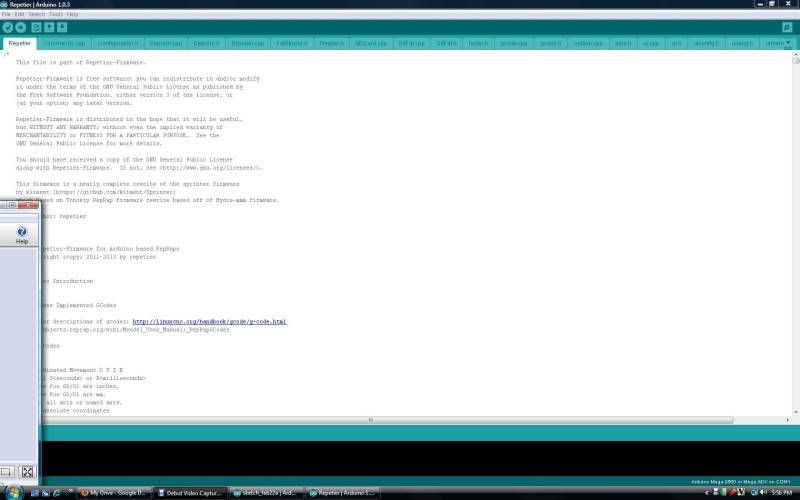
This is what you get. A buncha Greek. Or is that Geek?

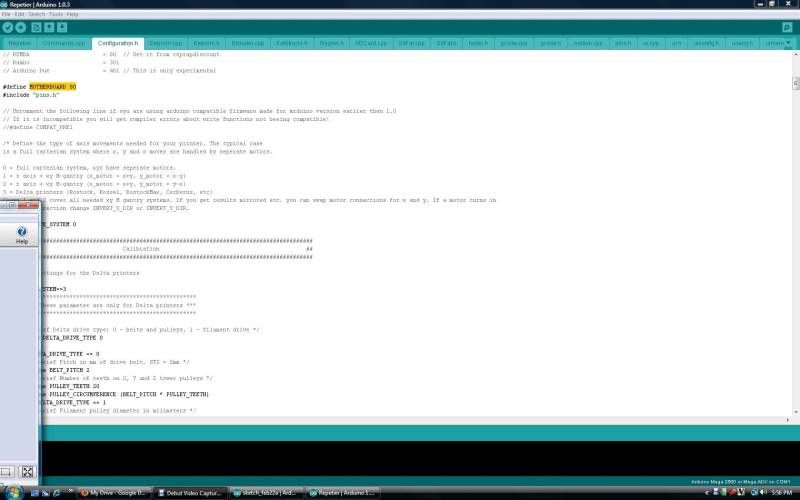
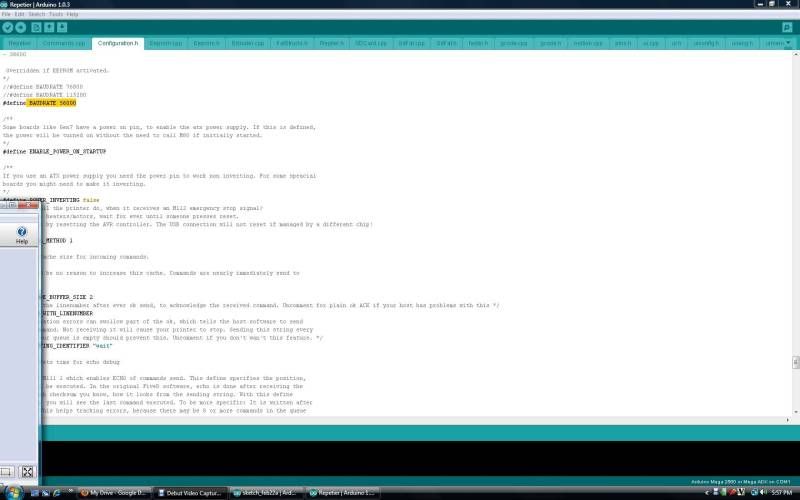
We need to change a couple of settings. First, click on the Configuration.h tab. Scroll down and find the "#define MOTHERBOARD XXX" and change the number where the X's are (mine defaulted to 33) to 80.
Now scroll way down and find the Communication configuration section, and set the baudrate. I changed it from "#define BAUDRATE 250000" to "#define BAUDRATE 56000", cause it was recommended SOMEWHERE in the all the reading I did...
Now for the big step. You have to go to the RUMBA wiki and copy the pins.h information. Find it here: http://reprap.org/wiki/RUMBA#RUMBA_F..._Configuration Copy the entire section under Rumba Pin Configuration.
Now go back to the Arduino software, and click the pins.h tab. You may have to use the down arrow at the upper right hand corner of the screen to find it on the list.
The pins.h seems to have a crap load of different option for different boards. I just scrolled down until I found the numerical order of things (remember, we set the motherboard to 80?) so the stuff I copied I pasted between option 70 and 331.
 I think you can past it between any other set of info.
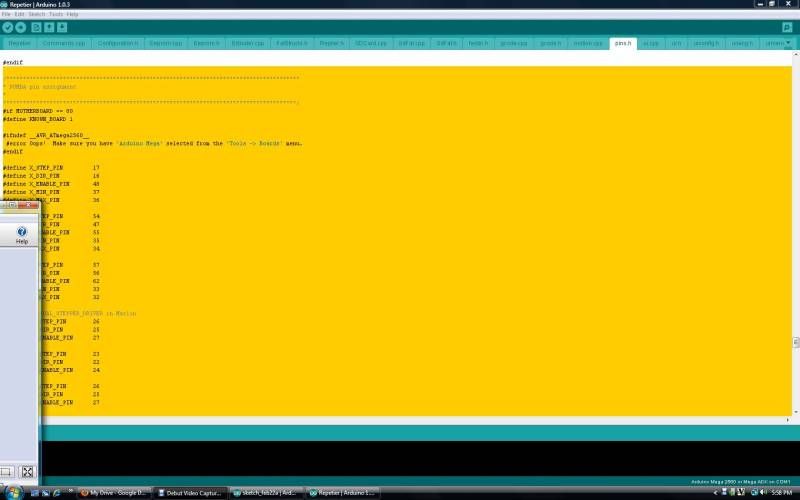
Are we TOTALLY LOST YET!? Cause I sure am!
Gets a bit easier now. Once all those changes are made, with the printer hooked up just click upload. It'll take a minute or two but when it says its done, you're ready for the next step.
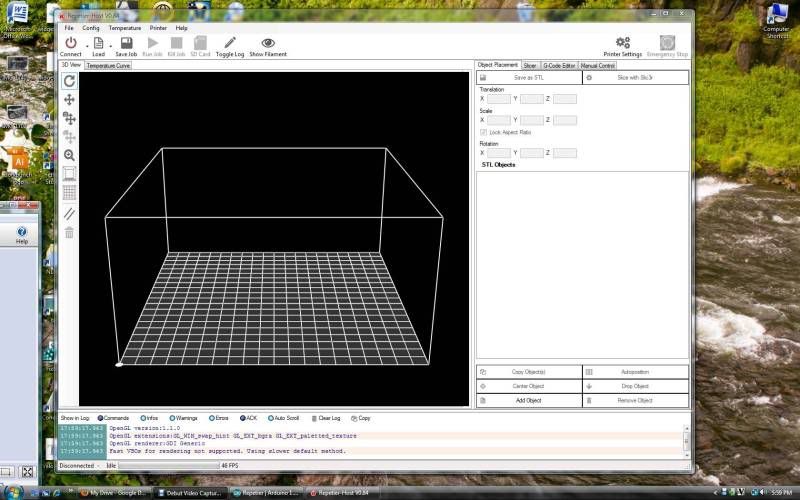
Download and install the Repetier SOFTWARE, available here: http://www.repetier.com/download/
. Open the software- looks somethin like this. PLEASE NOTE: There is another print control software called Pronterface, available here: http://koti.kapsi.fi/~kliment/printrun/ . It seems great. I like the Repetier software better but I'm having some issues getting it to finish prints... More on this later.
Now we need to set the software up to communicate with the printer. Click configure, choose printer, and this menu pops up.
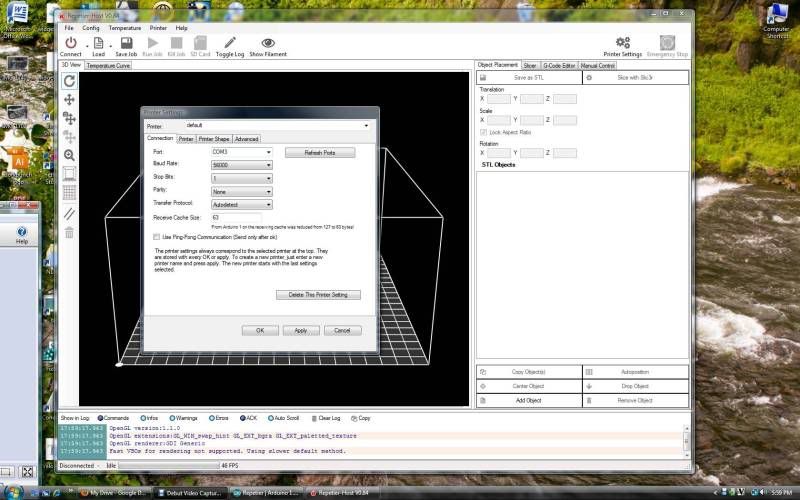
You will need to change the COM to the correct one (mine was COM 3) and change the baud rate to match whatever you set it to.
Apply the settings, and you should be ready! Plug the printer in to power, and click connect. It should connect and the connect button changes to "disconnect. Scootch over to the manual control tab, and try moving axis around!!!
May seem like a lot, but now that I've done it it really wasn't that bad. There is a TON of info on the Repetier website on installing and the hows and whys of printer software, available here: http://www.repetier.com/documentatio...-installation/
Careful with that link though, my brain almost exploded...
The sad part? I still am going to have to modify the firmware to set up the thermistors (thermometers on the extruder and heated bed) AND figure out how to set it up so that BOTH z axis stepper motors work at the same time. Ug. Marching forward...
One other thing- the guys at Makers Tool Works have been awesome at helping me out with this... They have a webchat channel that anytime so far I've logged in, someone was right there to help me out. Great customer service!

Time Spent on this step: Lets call it 1 hr.
Total time so far: 14 hrs. 15 min.
4 comments:
Hi,
I have a problem with my temp bed sensor. If I plug it on other port it works fine, but if I connect it on the temp sensor bed port it's not working.
Had you the same problem and have you found the solution?
Thanks for your help.
Regards.
This is the best compilation of instructions on how to get the RUMBA board to life that I saw so far - as to be expected from a good teacher :). Thanks!
How up-to-date is it? Specially the SDK-links, are they still valid? As someone who does not live completely immersed in this environment, I tend to get lost quickly in the information flood that is rarely as structured as your's here.
Not sure what you mean by SDK-links, but I clicked on a few of the links in my post and they all seem to go to the right places still... Been over a year since I posted this information and I haven't ever had to change anything and this is the only printer I've built so far.
Quite honestly, I am nowhere near immersed in this stuff. I did spend a huge chunk of time last year assembling and figuring it out, but now its mainly just print print print!
how do i set PID value in the firmware for rumba- ajay
Post a Comment